Axis.VirtualDevice .NET 8 Web Service Setup Guide
Overview
This guide describes how to install and configure the Axis.VirtualDevice .NET 8 Web Service on Windows using IIS. It covers prerequisites, application deployment, IIS setup, permissions, bindings, and troubleshooting.
Prerequisites
- Windows 10/11 or Windows Server 2016/2019/2022
- Administrative privileges
System Requirements
- Minimum 4 GB RAM
- 2 GHz dual-core processor or better
- IIS 10.0 or higher
Required Downloads
Part 1: Enable IIS (if not enabled)
Required IIS Components
- Web Server (IIS)
- Web Server > Application Development > .NET Extensibility
- Web Server > Application Development > ASP.NET
- Web Server > Security > Request Filtering
- Management Tools > IIS Management Console
Part 2: Deploy the Web Service
Step 1: Prepare the Application
- Extract the application files to a directory, e.g.,
C:\inetpub\Axis.VirtualDevice. - Ensure
web.configand all dependencies are present.
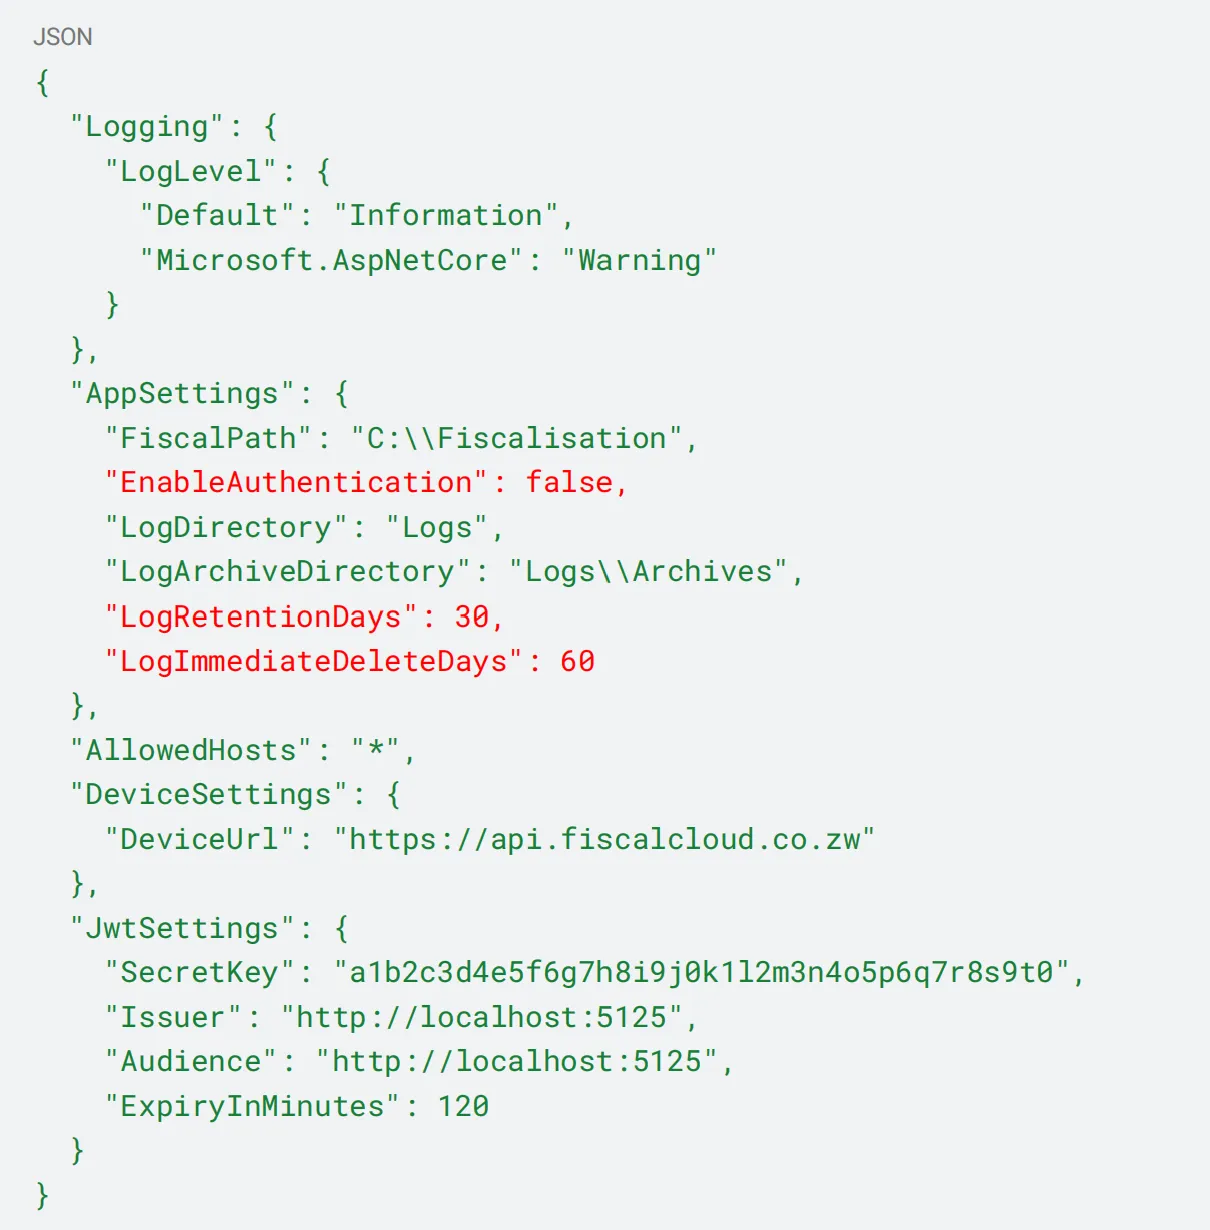
Step 2: Configure Application Settings
- Edit
appsettings.jsonorweb.configas needed for your environment (DB connection, logging, etc.).
Part 3: Configure IIS
Step 1: Create Application Pool
- Open IIS Manager.
- Go to Application Pools > Add Application Pool.
- Name:
Axis.VirtualDevice - .NET CLR Version: No Managed Code
- Managed pipeline: Integrated
Step 2: Configure Application Pool Settings
- Set Start Mode to AlwaysRunning (optional).
- Identity: use ApplicationPoolIdentity (recommended).
Step 3: Create Website
For Local Development:
- Site name:
Axis.VirtualDevice - Physical path: set to your app folder.
- Binding:
http://localhost:8080/swagger
For Cloud/Production:
- Use a registered domain and configure DNS.
- Bind to port 80/443 for HTTP/HTTPS.
Part 4: Configure Host Resolution (Local Only)
- Edit
C:\Windows\System32\drivers\etc\hoststo map your chosen hostname to127.0.0.1.
Part 5: Set Folder Permissions
Step 1: Configure Sharing Permissions
- Grant access to IIS_IUSRS and ApplicationPoolIdentity.
Step 2: Configure Security Permissions
- Ensure the app folder allows Read and Write for the necessary identity.
For Cloud Deployment:
- Restrict to only the required user/group.
Part 6: Configure Bindings (Cloud/Production)
For HTTPS (Recommended for Production):
- Obtain and install an SSL certificate.
- Edit IIS site bindings to add HTTPS, assign certificate.
Part 7: Test the Installation
Access URLs
- Local: http://Axis.VirtualDevice:10005/swagger/index.html
- Production(IP Based): http://140.82.25.196:10005/swagger/index.html
- Production(Domain Based): http://yourdomain.com:10005/swagger/index.html
Verification Steps
- Open IIS Manager
- Select your site
- Click Browse → *Browse :10005 (http)
- The Swagger UI should load
- Test API endpoints through Swagger interface
Troubleshooting
Common Issues:
-
Service won’t start: ○ Check Event Viewer for detailed errors ○ Verify .NET 8 Runtime is installed ○ Check application pool identity permissions
-
404 Not Found: ○ Verify URL Rewrite module is installed ○ Check web.config file exists ○ Verify application pool is running
-
500 Internal Server Error: ○ Check application logs in the Logs folder ○ Verify database connections (if applicable) ○ Check appsettings.json configuration
-
Authentication Issues: ○ Verify EnableAuthentication setting in appsettings.json ○ Check JWT configuration if authentication is enabled
Log Files:
● Application logs: C:\inetpub\wwwroot\Axis.VirtualDevice\Logs ● IIS logs: C:\inetpub\logs\LogFiles ● Event Viewer: Windows Logs → Application
Security Considerations
- Firewall: Ensure port 10005 is open in Windows Firewall
- SSL: Use HTTPS in production environments
- Authentication: Enable authentication for production deployments
- Network: Restrict access to trusted IP ranges if needed
Support
For additional support or issues:
- Check the application logs
- Verify all prerequisites are installed
- Ensure proper folder permissions are set
- Review IIS application pool status